Carmen
SE 47 Amplifier
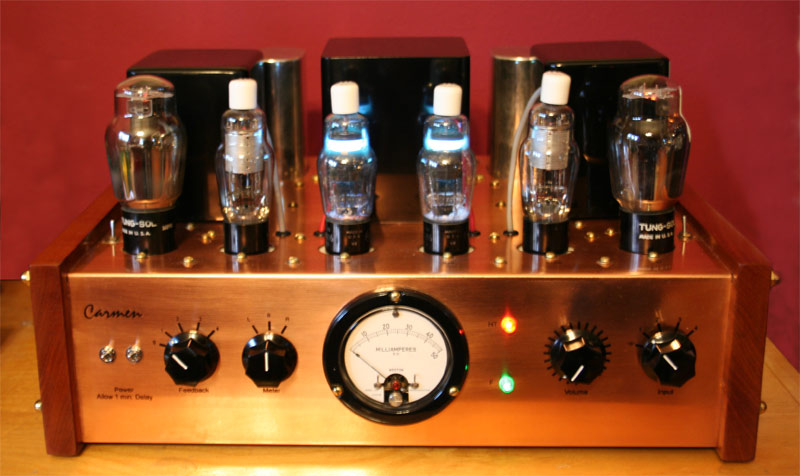
Here's a shot of my latest project. It's a Single-ended 47 Pentode amp. I
chose the copper chassis and mahogany side
panels to make something a little different from my regular amps. I think
it looks pretty good. It sounds great :-)
The amp is convertible between pentode and triode mode by flipping the toggle
switches beside each 47
output tube. It produces about 2.7 watts per channel in pentode mode, a little
less in triode mode.
The amp has something I haven't played with too much on SE amp, feedback.
I installed four levels of
feedback via resistors from the 8 ohm tap on the output transformers of each
channel. It's interesting to note the
effect of feedback on the ability of the amp to control bass frequencies.
So far, a little feedback sounds
OK in triode mode, but pentode requires a bit more. I think it's something
I'll play with for a while.
The power transformer provides 295-0-295 VAC at 100mA, about 320VAC with
no load from each half
Rectification is with a pair of 816 mercury vapor diodes. Driver tubes are
310As, but with the change of a filament
transformer the amp could use 6C6s instead.
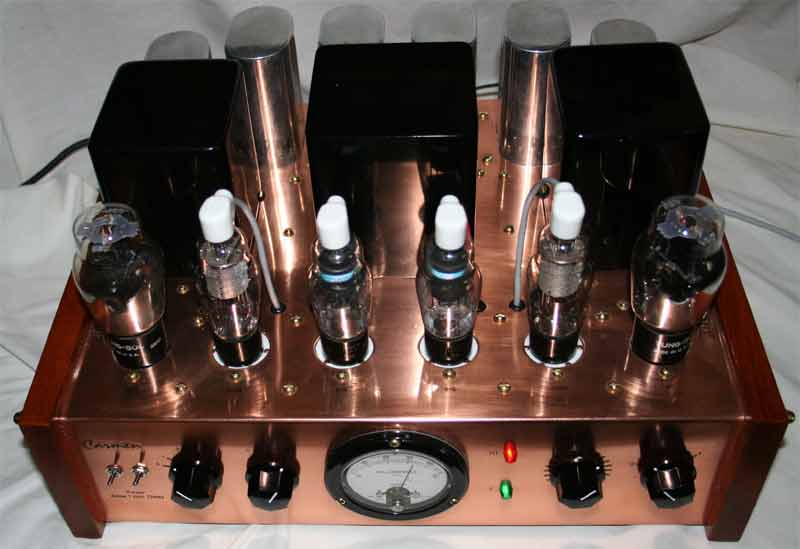
The switches on the front panel are, left to right, power switches (manual
delay for the MV tubes), feedback selector,
meter selector switch (the meter is out of the circuit in the center position
and it measures current through the 47s in the
left or right position), volume control and input selector. The two pilot
lights indicate filament power and high voltage.
This amp had so many controls that I felt I needed to label them somehow.
I thought about decals, but they never last and they don't look
very good in my opinion (at least the ones I've done). I considered having
the chassis engraved by a jeweler, but I was afraid
that I wouldn't get what I wanted and I didn't want to ruin the (expensive)
copper chassis. I decided to try my hand at
silk screening. It's not too difficult after you get the hang of coating the
screens with the photosensitive emulsion. You'll see below
how I laid out the chassis using graph paper. I scanned the layouts and inserted
the images full-size into a vector drawing
program where I laid out the labeling over the scans. I then removed the scans
and printed the artwork onto clear film using a
large-format plotter that I have access to at work. I used that positive image
to expose the coated screen and which allowed me to
wash out the unexposed emulsion leaving a porous screen for the ink to pass
through. After the ink dried overnight, I sprayed a top
coat of clear lacquer over the whole thing.
The copper was a bit difficult to work with because it's so soft. It was
very easy to scratch. I had a sheet metal shop do the
bends for me and I did the remainder of the metal work myself. The softness
of the copper makes for easy drilling and
cutting even though the metal is quite thick (two pounds per square foot).
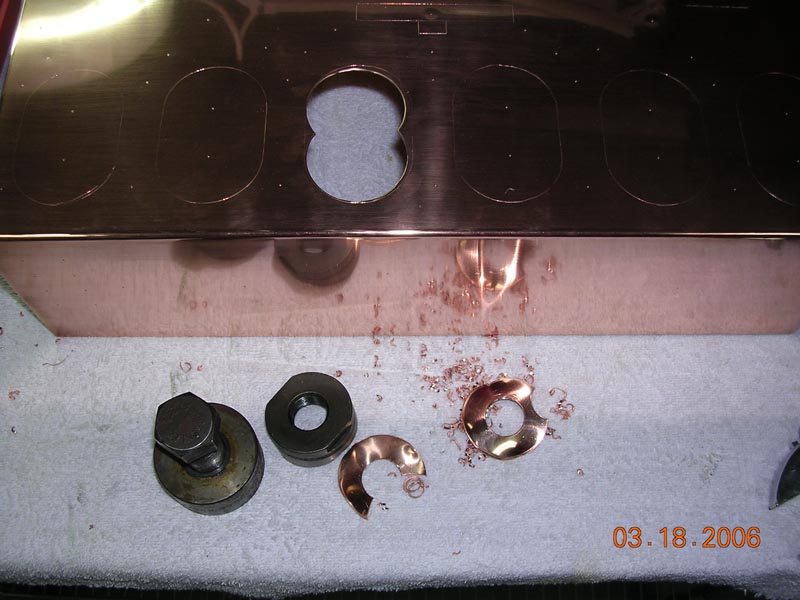
The socket holes were cut
with a chassis punch as were all of the oval holes which were hand finished
with a nibbler and a Dremel tool.
I cut the rectangular holes with a nibbler.
The circuit for this amp was given to me by a friend who asked that I not publish it, so I'll honor his wishes.
Here are a few more photos of the amp in progress.
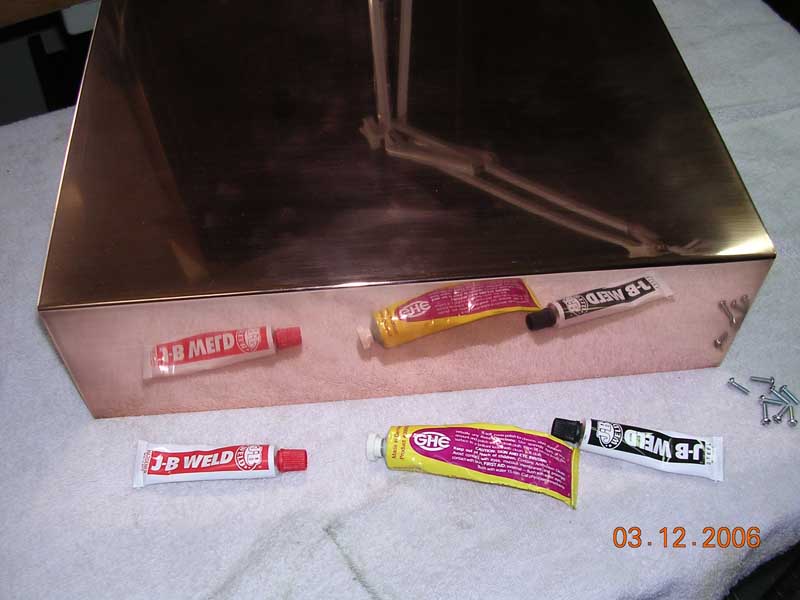
Nice shiny copper. It's a lot of work to polish. I hand sanded all surfaces
with successively finer grades of sandpaper, finishing
with 2000 grit lubricated with water. I then polished everything with automotive
polishing compound after I cut all the holes.
Clear lacquer prevents the copper from tarnishing. The mahogany side panels
are also finished with clear lacquer.
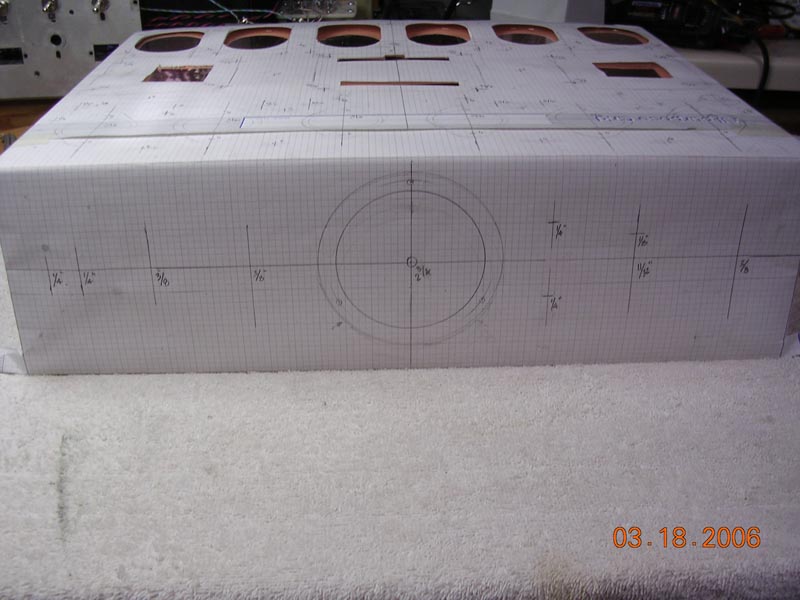
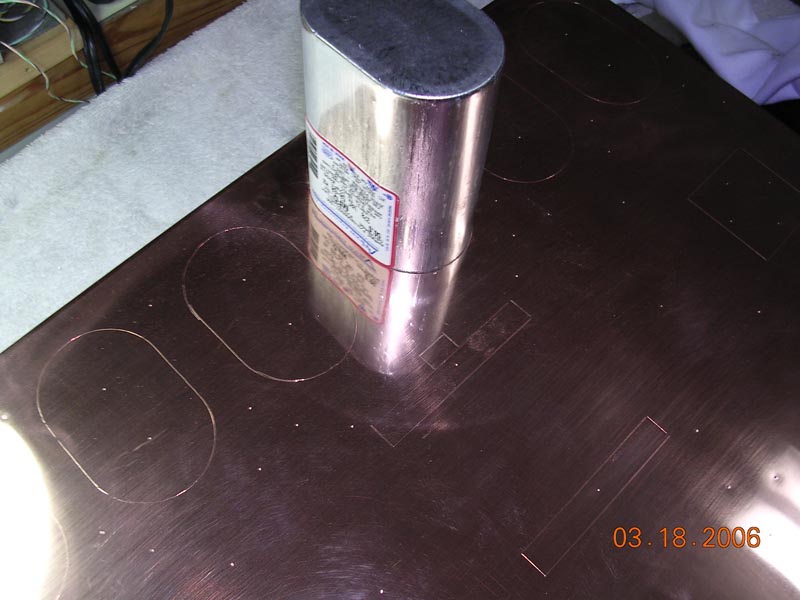
This is how I do the layout of the amp. I cover the chassis with graph paper
in order to align all the components and avoid
marring the polished copper. I use an automatic center punch to locate all
the holes for drilling.
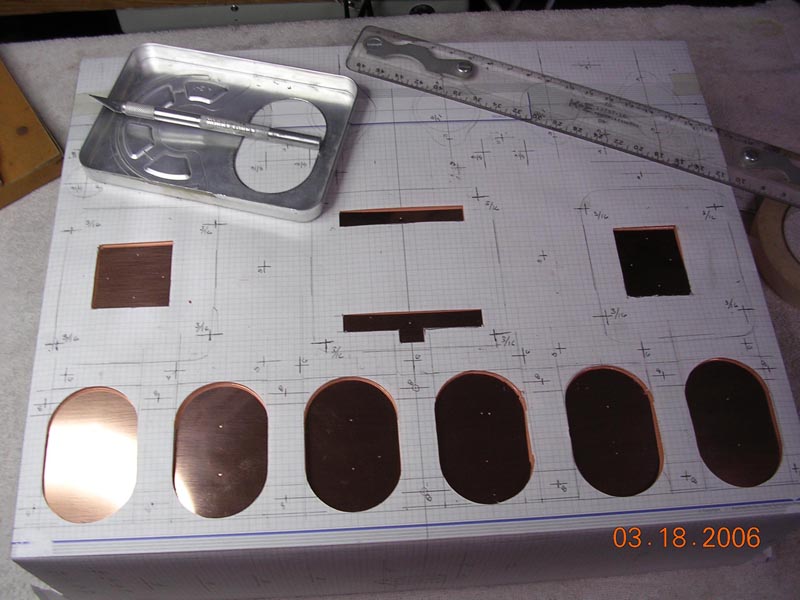
Cutting the oval holes was tricky. I used chassis punches and a nibbler with a Dremel finish.

Here's a shot of the inside of the amp. Lots of wiring!
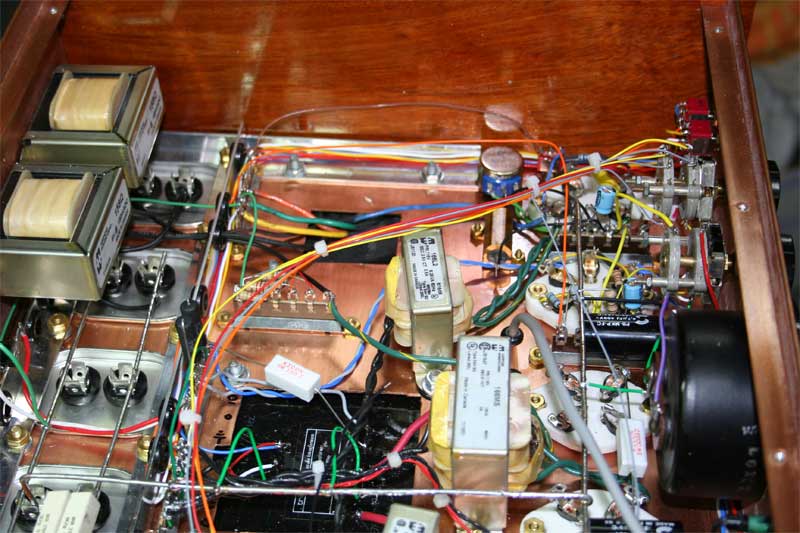
And the other side...
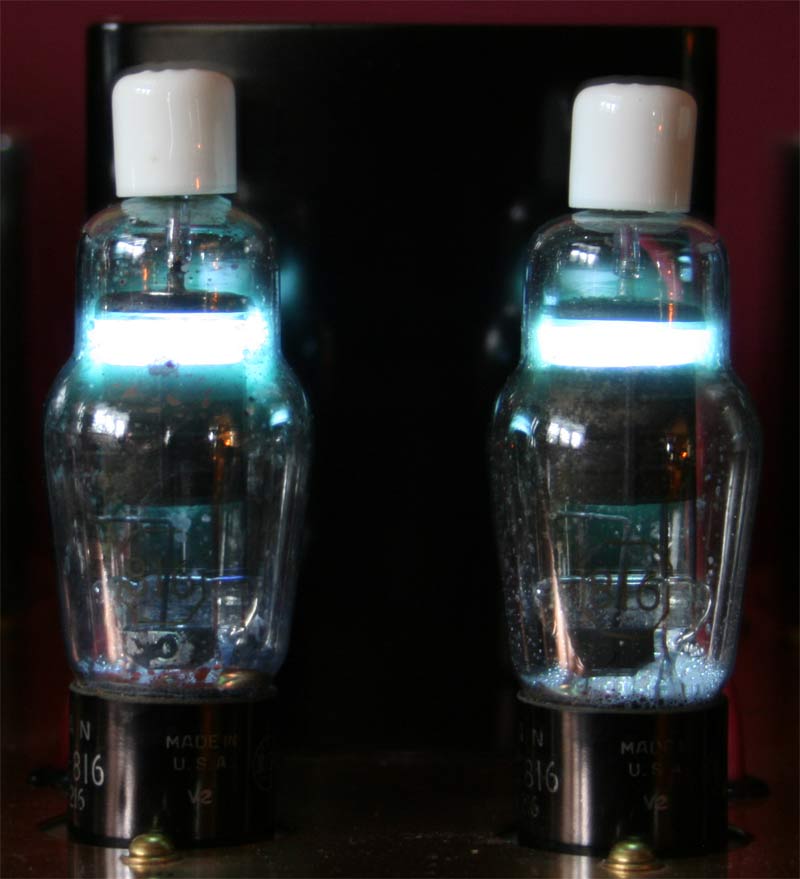
Here's a shot of the 816s at work. Love that blue glow!
So, how does it sound you ask? Very nice. It has very low hum levels, 1.5mV,
which I can't hear in my Klipsch Cornwalls which
are very sensitive speakers. It sounds much more powerful in pentode mode,
but I prefer the sound in triode mode with
just a touch of feedback applied.
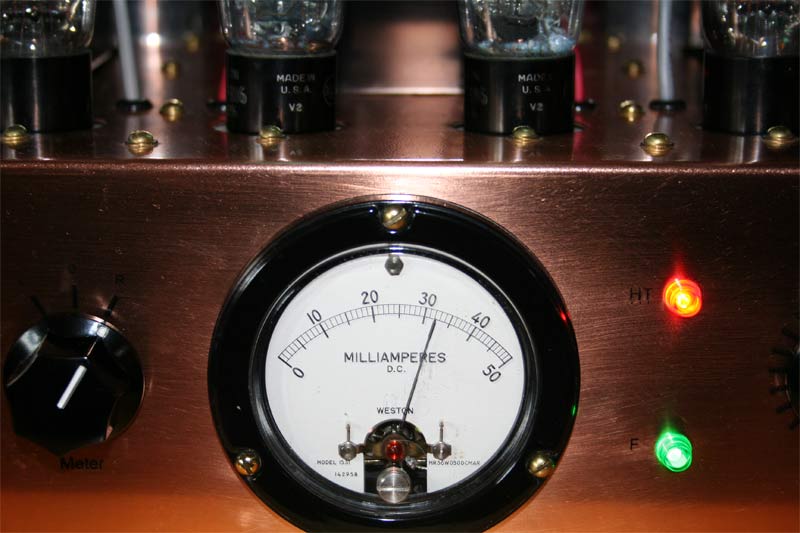
Here's the vintage Weston milliamp meter showing 32mA on the right 47.
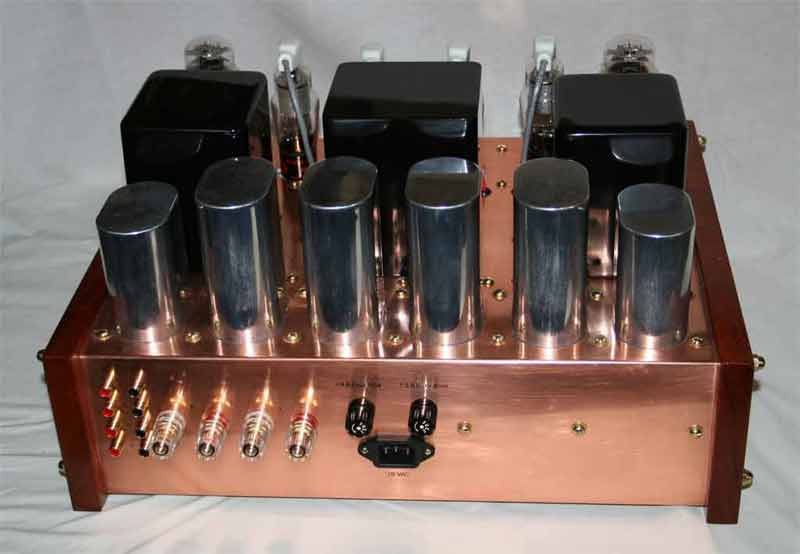
Here's a shot of the rear of the amp showing the input jacks, speaker terminals, mains and B+ fuses and IEC connector.
A shot looking down.
If you have any questions about this amp or any of the others on my site,
please feel free to email me at rkoonce@dsityler.com